
7 HEADACHE-FREE SIMPLE SCRAPBOOK LAYOUTS YOU CAN TRY TODAY!
Get Inspired By These Simple Scrapbook Layouts...
Scrapbook Coach brings you a range of inspirational scrapbook ideas and products to make your projects that much more special and fun.
These simple scrapbook layouts will help you create a scrapbook album filled with wonderful pages that you'll be proud of!
Read on for seven amazing scrapbooking ideas that won't take up a lot of your time! One word of warning though, once you discover how easy these layout ideas are, you'll want to use them over and over!

Easy layouts can become highly addictive!
Want more inspiring scrapbook layouts to get you going? Click here and check out our Scrapbook Layout Ideas Books!
OUR AMAZING SCRAPBOOK LAYOUT IDEAS
Creating a scrapbook page using a 3×3 layout. Think tic-tac-toe!
When it comes to easy and fun styling options, creating a 3×3 design is at the top of the list.
Choose four photos for your scrapbook page. Using card stock, divide your background paper into nine equal sections–three blocks across and three blocks down.
Make the dividers a half-inch wide. Before adhering the dividers into place. trace the inside of the middle square and the four corner squares.
If necessary, crop each photo to fit inside one of the corner squares. Ideally, the photo should fill the entire square and once the dividers are added, it will appear as though the photo is framed.
Cut a piece of card stock for the center square of your scrapbook page. Add your title to the card stock. Adhere the photos and title to the page and then adhere to the dividers. Use the empty squares for journaling and embellishments.
The same format can be used with three photos instead of four. Arrange the photos horizontally, vertically, or even diagonally.

Focus on one photo – Simple yet elegant
Is there a photo that speaks for itself? Does just looking at the photo trigger an emotion?
Make a scrapbook using a 5×7 copy of the photo, place it off-center onto the background of your scrapbook page. Add a title to the upper left corner of the layout. Journal beneath the photo with just a few words. Add a scrapbook border to one of the sides of the layout and embellish with a tiny bow, old buttons, or a sticker message.
Journal on index cards – Quick and easy.
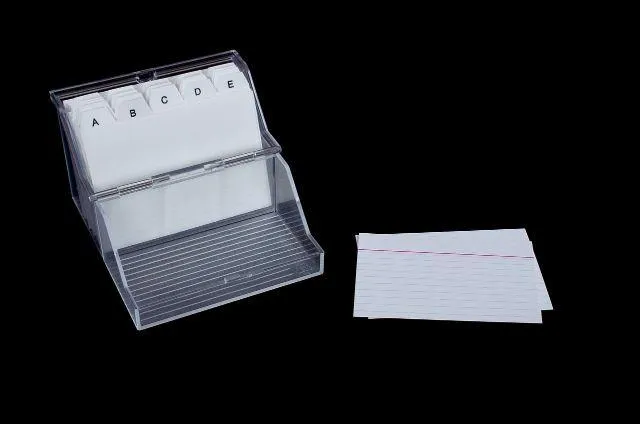
Journal your favorite memories and share your story through scrapbooking!
Index cards are a great way to help in creating a scrapbook album. Try this:
1. Begin with a solid background for your scrapbook page.
2. Frame two photos with the same paper or cardstock or even washi tape on your page.
3. Place the photos in the upper left and lower right corner, with at least an inch and a half from the photo to the edge of the paper.
4. Using the index cards, journal about the photos.
Feel free to use these cards throughout
your scrapbook pages. It's a great journaling idea for a scrapbook page.
5. Center the index cards in the upper right corner and lower-left corner of your scrapbook page.
6. Matt the journal cards with a quarter-inch of paper.
Tip: Check out our article and learn how to make a scrapbook the easy way!
Use different shades and a pattern of one color – Divide the background.
To highlight a couple of photos, scrapbook layout ideas can easily be diversified by using different shades of one color.
Let's say for example, that you want to make a layout of your kids jumping into the leaves. Use orange as your background. Cover the left half of the background with a leaf-patterned scrapbook paper that has muted yellow and orange leaves in it. In the center of the page, adhere orange card stock that is lighter or darker than the background. Now you're ready to add your photos to the card stock. Add a title to the page and journal in the lower right corner.
Embellish the page with a few tiny fabric leaves.
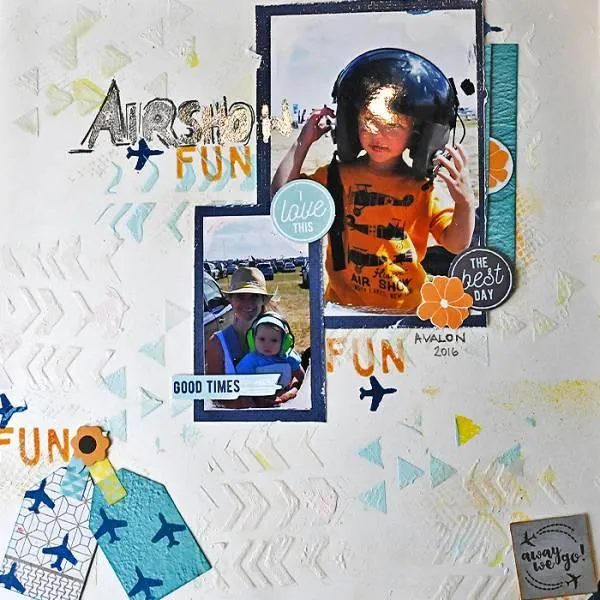
Incorporate different size photos – Enlarge the focal point.
Sometimes simple scrapbook layouts provide more eye appeal than detailed designs. By keeping things simple, your eyes are naturally drawn to the photos on the page. If there are lots of embellishments and intricate stamp work, a photo can get lost.
Here is an easy way to keep the focus on the photos. Begin with a patterned background. As an example, you want to make a layout of your kids enjoying an airshow. You would choose a background paper that has lots of airplanes or in this case, you can just make your own background pattern with stamps. Next, form a square using a 5×7 photo, a smaller photo, and two pieces of card stock. Use a 5×7 photo of your son wearing a pilot helmet, underneath, add card stock for journaling.
Next to the cardstock add a smaller photo, I used a photo of me and my son attending an airshow when he was much younger. Above the photo, add matching cardstock. Use this space for the title. Add tacks to the four corners of the square and you're done!
Slant your photos. Super easy!
This is one of those scrapbook layout ideas that looks like it takes a lot of work, but actually doesn't! Begin with a patterned background to start your slanted photo page.
Matt both photos with the same material and add them to your layout. Overlap the photos by using the lower corner of one and the upper corner of the other, and slant one upwards and one downwards. Add a slanted title and a framed box for journaling. This is super quick and easy and looks like a lot of work because of the background and matting.

Crop your photos – Use circles and a square.
Using a scrapbook circle and square template can help create simple scrapbook pages. Crop the square photo into a 5×5 or 4×4 square. Using the round photo, crop three photos with a 3-inch diameter. Use a solid background for your layout. Using patterned paper, place a one-inch strip across the top of the scrapbook page (about 3 inches from the top) and a one-inch strip vertically along the right side of the page (about 3 inches from the right).
Use additional paper to create a simple bow to cover where the strips cross each other. Along the top strip of your scrapbook page, center the three-round photos. Center the square photo in the open space below the top strip. Journal to the left of the photo.
Get started on your simple scrapbook layouts!
Now that you are equipped with these seven beautiful yet convenient scrapbook layout ideas, you can get started today! And the best part is that each of these options can be used more than once. As you use different backgrounds and matting, each page of your album will appear unique and different.
Check out our article about scrapbooking ideas and discover more creative layouts and inspiration for your next scrapbook ideas!
Topic: Simple Scrapbook Layouts
OUR BEST SELLING BOOKS


HERE'S SOME OTHER SCRAPBOOKING ARTICLES THAT YOU MAY FIND HELPFUL
The Top 5 Scrapbooking Tools That Are Proven To Help You Create Better Layouts
12×12 Scrapbook Layouts Tips You Should Never Miss!
5 Tips To Creating Catchy Scrapbook Titles For Your Layouts
TOP 5 Scrapbooking Ideas I LOVE!
How to Scrapbook: The Ultimate 'Learning How to Scrapbook for Beginners'
Scrapbooking Tips: 10 Tips To Help You Create Even More Enchanting Pages!
5 Simple Scrapbook Organization Ideas and Tips!
Scrapbook Stores Online: Shop from the Top 7 Best Craft Stores
Contact Us | Login | Store | About | Reviews | Privacy Policy | Terms & Conditions | Returns
Copyright © 2025 by ScrapbookingCoach.com
We accept payment with:
